Saturday, March 31, 2012

BLT Goodness

I'm not the world's top expert at saying no. Yes eases off the tongue a good bit easier for me. Saying no is something I have to practice and be intentional about. If not I'll end up on 23 committees, with 47 projects, stressed and way over committed. 

However, some things are easier to say no to. Can you give me your username and password so we can share the account that you pay for? No. Can I drink the last bit of your milk. No. Can I drink your last Dr. Pepper 10. No. Can you fold my clothes? No. Can I use your toothbrush? No. Okay. I'm mildly being silly. I probably would let you drink the last of my milk and my last Dr. Pepper 10. But I have to give myself a pep talk every time I fold my own clothes, so good look with that. And no. I really won't give you my password and username or let you use my toothbrush. 

Even if you don't have the Can't-Say-No-Syndrome like me, there are just some things you don't want to say no to. You could call them impossible to say no to. Red Velvet cake for breakfast. Just can't say no. Starbucks iced and blended beverages. Nutella on a spoon out of the jar. And...

One word. 


Bacon. Who can resist? Not me. I actually don't eat bacon often. I do "real" bacon bits on my salads and in green beans, but I don't crave/need/want/must have bacon until Spring and Summer. Why? Thee letters.

B - L - T. So simple. So classic. So perfect. So irresistible. I actually don't enjoy the traditional bacon or way of cooking it. It's greasy and poppy and makes the entire house smell like grease. However, when I started Weight Watchers I discovered Oscar Mayer Fully Cooked Bacon. It's center cut [read less fat], microwavable, AND only TWO points per serving. And a serving? FOUR slices! I haven't bought or had it since fall arrived. 

My taste buds and brain are weird about crossing things I consider to be seasonal foods over to other seasons. (Examples: I can't eat soup or grilled cheese unless it's Winter or Fall. I can't drink hot beverages in Spring and Summer. I don't eat guacamole, watermelon, avocados or pineapple in the cold weather seasons.) So, I equate BLTs with Spring and Summer. Fresh tomatoes from my Pawpaw's garden are probably to blame for this. 

Here in the HOT great South, we've been in full Spring swing since January. (A slight exaggeration but not by much.) I pinned Skinnytaste's BLT Lettuce Wraps long ago, in anticipation of seasonal BLTs. I pretty much followed her recipe exactly with a few minor alterations. I used fat free mayo, the aforementioned microwaveable bacon, romaine lettuce leaves, and chopped grape tomatoes. I recently attempted my first Lettuce Wraps with iceburg leaves as she suggests. I failed! They broke and did not work at all for me. A head of romaine is $1.00 at Wal-mart and seems to be a little more substantial to me. 

BLT Lettuce Wraps
original recipe from skinnytaste.com


Ingredients: 
  • 16 slices Oscar Mayer fully cooked bacon
  • 1 1/2 cups grape tomatoes
  • 3 tbsp Kraft Fat Free Mayo
  • 6 romaine lettuce leaves, hard ends removed
  • 1 cup chopped lettuce
  • salt
  • black pepper

Directions: 
Microwave 8 slices of bacon at a time for 60 seconds. Blot off excess oil. Chop and set aside. Chop grape tomatoes. I cut them in half, then little circles and discard the excess seeds and juice. Stir mayo into tomatoes. Add salt to taste to tomato mixtures. I wouldn't add too much, because the bacon has a natural saltiness. Add fresh cracked black pepper to mixture.


My recipe yields 3 servings of  2 wraps per serving. To build a wrap sprinkle a little chopped lettuce in the romaine cup. Spoon 1/6th (a couple tablespoons) of the tomato mixture on top of the lettuce. Sprinkle 1/6th of the bacon on top. Tuck the bottom harder end in a bit and then roll the lettuce wrap over from side to side. It's a little flimsy still, so I just wrapped mine in a napkin.

Each serving (2 wraps) is 4 points on Weight Watchers according to the recipe builder.

I served these with baked zucchini sticks and baked sweet potato fries dipped in skinny caramelized onion dip (recipes coming soon). 


Chicken and Broccoli Noodle Casserole

If you've been following, you know that one of this week's meals was Skinnytaste's Chicken and Broccoli Noodle Casserole. Oh my goodness was it good! I served it to four RAs and myself for one of their birthdays this week. They all LOVED it. They had seconds and thirds and raved about it the entire time. I even got a few more comments from the eaters the next day. You know you made a good meal when people still talk about it days later.

Chicken Broccoli Noodle Casserole
adapted from skinnytaste.com


With some basic ingredients and a little effort you can have a yummy, filling, impressive casserole. It's a creamy casserole with absolutely NO cream of anything canned soups. I only changed the recipe just slightly. I used skim milk instead of 1% and Great Value whole wheat extra wide noodles instead of the more expensive brand. The other changes were minor as well and just based on my personal preferences. I'll write the recipe with the changes I made, but please see the above listing for the original.

I make my own bread crumbs from lower calorie bread, freeze them, and always have them on hand for recipes.

Doing a little prep work the night before or on your prep work day is a great way to make this meal take less time to prepare. Things you can do before: make bread crumbs, make chicken stock, make shredded chicken and pre-measure it out, and chop onions to keep on hand for recipes. 

I used the shredded chicken I made on meal prep day on this recipe. I also rely on my good scale OFTEN! 
Ingredients:
  • 6 oz Great Value extra wide whole wheat noodles
  • 2 tsp olive oil
  • 2 tsp minced garlic (I used the jarred kind)
  • 14 oz bag of frozen broccoli
  • 1 tbsp butter
  • 1 medium sweet onion, minced
  • 3 tbsp all purpose flour 
  • 1-3/4 cups fat free chicken broth
  • 1 cup skim milk
  • 12 oz cooked shredded chicken breast
  • 4 oz shredded reduced fat cheddar (I used half sharp, half mild)
  • cooking spray
  • 3 tbsp shredded parmesan cheese
  • 2 tbsp seasoned breadcrumbs


Directions: 
Cook noodles in salted water until soft with a little bite. Drain and set aside. Noodles will cook in the oven too, so under cooking them just slightly is okay. Preheat oven to 375. Heat oil in a skillet. Add garlic and cook on medium heat until golden brown. Add frozen broccoli and saute with oil and garlic until broccoli gets soft and a few sprigs are just barely turning brown. Set aside. In another skillet heat butter until melted. Add minced onion and a little salt to sweat the onions, cook until translucent and soft. Add flour. Cook 2-3 more minutes coating onions in the flour. I like to multitask to minimize time, so I was cooking noodles, broccoli, and onions all at the same time. I recommend doing it that way, but if it stresses you out do it at your own pace and own way. 

Add chicken broth to the onions and flour. Whisk in slowly. Stir in milk and bring to a boil. Simmer, stirring occasionally until thickened. Remove from heat and stir in cheddar cheese and 1 tbsp of the parmesan cheese. Mix until cheese is almost completely melted. Add the shredded chicken, broccoli and noodles. Stir until everything is coated and pour into a sprayed 9 x 13 baking dish. Top with remaining parmesan cheese and bread crumbs. Spray cooking spray lightly on top and bake for 25-30 minutes. 

I always have to think really hard about sides for dishes like this. Casseroles often have everything in them! Starch, veggies, dairy. Steam in the bag veggies can be great side dishes if you doctor them up a bit. I served this with two additional veggies, one starchy and one green. I made steam in the bag corn with a tablespoon of yogurt butter, a little salt, a good bit of fresh cracked black pepper. I also made steam in the bag brussel sprouts. I quartered them after they cooked. That part is a little hot, but just do it fast! It's worth it. People will like brussel sprouts if you chop them up a bit. I sauteed them in some yogurt butter and added Tony's with a heavy hand (I love that stuff!).

I didn't calculate the points for my version, but it would be equal to or less than hers since I used skim milk. Her recipe is 8 points for 1/6th of the recipe. 

Tuesday, March 27, 2012

Meal Prep Monday

My job is great for many, many reasons. I could ramble on about it for hours. Don't worry, I won't. At least not today. :) One of the many reasons I love my job is that every other Monday I don't work! I work 20 hours a week in the office and 20 in the building. I alternate being off on Mondays and Fridays every other week. Fridays off are nice. It feels luxurious. Sleeping in is a must. Pajamas are a must. Laziness and relaxation usually happen. It's like an early kick off to the weekend.

Mondays off... They are a whole other thing. I love Mondays off because I'm so productive! If I haven't done my two week shopping yet, I do it. I get up early. I usually treat myself to Starbucks. 

Oh. Allow me to interrupt myself for an important announcement. Since January I've been on a  journey. A Starbucks journey. For years I've generously partaken of Starbucks beverages and never knew about being a Gold Card holder. Long story short if you don't know... Gold = benefits! Free things, a free drink every 15th, free birthday drink, free milk swaps and syrup additions. To become Gold you must register a giftcard, purchase drinks on the card (you're already spending the money anyway! just put it on the card), and make it to 30. On your 30th drink they mail you your Gold Card. To maintain Gold you just have to purchase 30 drinks a year. I'd like to say that will be hard to do, but let's be honest, it's just not an issue. Today, as I treated myself to Starbucks on a productive Monday off, I made 29! It's getting hot in my neck of the woods and unfortunately my car AC has been broken for a couple of years. I have this anti hot beverage thing that goes from March - September anyway, but when it's hot, heavy on the milk things don't sound appetizing to me. I ALMOST skipped on #29 for today, but then I remembered way back in college that Starbucks had a Green Tea Frappucinno. I decided to be brave and risky and ask if they could still make those. My favorite barista came through! She made me the most lovely Venti Raspberry Green Tea Skinny Frappuccino. A good Starbucks barista is like a good hair stylist. 


So right... Mondays off. I love them! I shop. I organize. I clean. And then I do one of my most favorite things in the entire world. Meal prep. Oh how I love it! It always involves cutting up produce for easy healthy eating access and quicker cooking. 


I know people say not to pre-cut strawberries and I get it. BUT... when I don't cut them? They go to waste and become moldy garbage! When I do? I snack on healthy bit sized berries all week, I grab them for a breakfast addition, I sneak them in lunches, and I top microwave mini cakes with them. They last at least two weeks for me without going bad at all. I also love love love green onions. I could seriously eat them on almost anything. Before I started cutting and chopping my produce when I brought it home, they always went bad and got thrown away. I started chopping them and keeping them in tupperware containers. They lasted longer, but I still always had to throw some away. The ever faithful clever Pinterest introduced me to my new way of handling green onions and I'll never go back. I saw a pin where someone suggested chopping green onions, storing them in a plastic bottle, and freezing them. They shake out super easy for any recipe. I'll seriously never go back to any other way! I use a Wal-mart brand Extra Virgin Olive Oil bottle. Be sure to use a funnel to transfer them from cutting board to bottle or you'll go crazy. I use a funnel and then shove them down with a wooden skewer. I even use the frozen green onions in cold dishes like chicken and tuna salad. They thaw quickly being so small and add the exact same flavor as fresh. 

I also use meal prep days to do any do ahead things that I can for that weeks meals. This often involves making chicken stock and/or shredded chicken. 


Every month or so I make my own chicken stock in the crock pot and freeze some. I use Skinnytaste's recipe and it's yummy and flawless. Every few weeks I also make shredded chicken in the crock pot. It freezes perfectly to use in meals like tacos, enchiladas, casseroles, or on salads. If I'm not making stock, and just making shredded chicken I just throw three frozen chicken breasts in the crock pot with an onion (peeled, cut in half, ends on), a couple of green onions (I used the wilting ends and the least pretty ones from the pack), minced garlic, and a good bit of Tony's. Cover the chicken with water, filling the crock pot almost to the top. Cook on high for 6 hours, let cool and shred. This week I'm using it in the previously mentioned Chicken and Broccoli Noodle Casserole and probably some leftovers for a quick salad topping.

I also like to make breakfast and snack options for the week on meal prep days. If I don't have my faithful fat free sour cream mixed with a dry ranch packet I always make that. I cut cucumbers and fruit for easy dipping and snacking. I make flavored cream cheese for bagels, freeze banana for chocolate covered banana bites, make homemade bread crumbs for recipes, prepare a batch crustless breakfast quiches, boil eggs and more! This week I made Frozen Yogurt Bites.


Have you ever bought a bunch of yogurt to counteract the effects of an antibiotic, get tired of said yogurt and then realzie it's about to go bad? Oh.. Yeah. Maybe that's just me who gets weird post antibiotic mouth sicknesses that normally only happen to babies. Well... maybe you've bought a bunch of yogurt because it was on sale at Kroger for a 10 for 10 deal? That seems more likely and normal. If so, this is a great way to use up yogurt! Or if you are like me and don't really like yogurt but know you should eat it because it's good for you, try this. It's way more enjoyable to eat. I used four different kinds of Yoplait, Cherry Orchid, Orange Creamsicle, Vanilla, and Harvest Peach. I emptied each container in its own sandwich sized ziplock. I just barely cut the tip off one corner and piped little yogurt rounds onto a wax paper lined cookie sheet. I stuck them in the freezer for a few hours until they were frozen enough to peel off and store in a gallon ziplock. I also imagine kids would love these. They are sweet, creamy, frozen refreshing treats. 

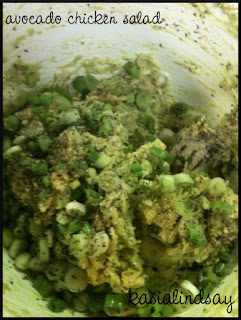
Last, but not least. I always try to make some sort of lunch option. I have my faithful deli meat to rely on, but I just cannot eat a turkey sandwich every day. I often mix up a batch of apple and boiled egg tuna salad or grapes and sage chicken salad. Fruit chicken salads are my favorite! Gimme apples, grapes, or cranberries, toss in some celery, sage, and nuts and I'm a happy camper. However, I recently discovered a delicious twist on chicken salad! Avocado. I already don't do much mayo if any in my normal chicken salad. I use greek yogurt, fat free sour cream, or fat free mayo. But this chicken salad requires none of the above! 


It's so yummy and earthy and just perfect. It's great on wheat bread, pretzel chips, tortilla chips, carrot chips, a spoon, a finger... The avocado provides the perfect creaminess. Lime juice keeps it fresh and the avocado from browning as well as adds a little more wetness. I found the idea on pinterest and tweaked it to be my own. I did most of the flavors to taste and I suggest you do the same. I'll guesstimate on my measurements for a base though. 

Avocado Chicken Salad


Ingredients: 
1 13 oz can of chicken breast 
2 ripe avocados
1-2 tbsp lime juice
2-3 tbsp chopped green onions
1/2 tsp dried cilantro
1/4 tsp salt
1/4 tsp garlic powder
1/8 tsp cracked black pepper

Directions: 
Open and drain the canned chicken. Separate and break apart the chicken in a medium sized bowl with a fork. Cut avocados in half and separate. Remove seed. Leaving the avocado skin on, cut three slices long ways, not going all the way through the skin. Cut across in the other direction three times, making the avocado look like little squares inside the skin. You should be able to turn the skin inside out and have the pieces fall right into your bowl. If they get stuck, simply use a spoon to scrape all the avocado flesh out. Add remaining ingredients and stir until combined. Serve as a dip, on a sandwich, or on top of salad greens. 

Remember. Cooking doesn't have to be such a chore! The more prep work you do, the easier meals and cooking are for the rest of the week. Don't be afraid to pull up a cutting board and trash bowl to the bar and sit while you do it! Find ways to make cooking, planning, and preparation more enjoyable. 


Sunday, March 25, 2012

Meal Planning 101: Week 1

I'm very passionate about meal planning. If you know me or have been reading my blog at all in the last couple of years, you know this. A wonderful mentor of mine, Christie, was the first to introduce me to the idea. She's a mom of three and so organized. Christie and her husband Jason are earth friendly, so organized, and live strictly by their budget, which saves them a lot of money. Jason taught me about budgeting and even created a sample budget for me that I still use! And Christie taught me all about organization and meal planning. They were such a huge influence on my life in so many areas. As a graduate student in my apartment with my three roommates and on a super tight student budget the meal planning began. In the years since, it's definitely become a hobby an obsession. Needless to say, I'm a HUGE advocate of meal planning and I'll tell you why.

Reason #1 - It saves money. Really! It does. If you don't meal plan and just shop when you come up with something, you know you always add extra things to the cart with each trip. Those extra things and extra trips add up. You also buy groceries with more intention. Yes, every kitchen needs staples. BUT when you don't plan you aimlessly buy things you think you need, that you don't actually need! I'll address eating out later, BUT it also saves on your eating out cost. If you plan, you eat out way less and make meals you're proud of that cost a fraction of the price they would at a restaurant.

Reason #2 - It cuts back on waste. It's strategic! If you find one recipe you want to make that requires buttermilk, you find others to include in your plan that need buttermilk, thus you don't waste the rest of that buttermilk. When you don't plan, lots of things end up expiring and going to waste. Better for the environment and again.. YOUR POCKET! Green is in, haven't you heard? (Now if only my state would jump on the green bandwagon and make recycling easier...)

Reason #3 - It's healthier! When you plan your own meals you are much less likely to plan an abundance of unhealthy things. Planning also greatly cuts back on the amount of fast food stops and splurges you make (which again, also saves you money). Not to mention, when you plan and cook your own food, not only do you cut back on fat, but you control the amount of sodium, butter, oil, preservatives and exactly what goes into everything you eat.

Reason #4 - It's exciting. The number one thing I hear from people who cook is that they get tired of cooking the same things. If you think and buy for meals on the fly, you're always gonna gravitate to the same things. In meal planning you get to plan in your own excitement to your meals!

And so, I've always wanted to share meal plans with you guys, but I didn't think there was an interest or market in boring things like that. Then I happened upon this blog! She posts recipes as well, but every Sunday she simply posts her weekly meal plan. I was/am inspired and have decided I'll do the same! 

This was my meal plan from a couple of weeks ago. 

A quick few meal planning tips for you. 

1. Don't be overwhelmed! Start small. Try it for one week at a time first. Currently I do two weeks at a time because that is my pay schedule (every other week). When I got paid once a month I did do it a month at a time. I planned the entire month and shopped only once a month. Yes! It is entirely possible. 

2. Use your resources! Those cook books you have? Break them out! Read them. Set little fun goals. When I was doing monthly planning, I set some guidelines like at least one new recipe a week and at least two recipes from my cookbooks a month. The internet is your cooking companion. Let's call her you sous chef! There are SOOO many food blogs out there (if you want a list, I'll be more than happy to hook you up). Set up Google Reader and subscribe to people who post great recipes so you see them often (I can also tell you how to do that if you need assistance). Pinterest is of course a great resource as well. 

3. Look at sale ads. I know Kroger and Target send weekly sale emails. Wal-mart has a weekly sale paper. Don't be afraid of coupons! If you have a farmer's market, find out when they sale things. Fresh produce is better and often cheaper. If you have a Sam's Club, it's not just for bulk items. I am a single person and every two weeks I visit Sam's! Sam's is wonderful for cheaper produce and meats. When I did monthly planning, I would wait to plan my meals until I knew what meats were on sale.

4. Have fun getting organized! Christie always had a big dry erase white board calendar where she recorded her meal plan. I posted a picture of the method to my madness above. I've tried apps and digital list makers, but there is just something I love about writing out my own list. I have a magnetic list on the fridge where I write random things I think of through out the week or things that I run out of. During the week, I type meal ideas and ingredients into a Google Tasks list. The day before I will be doing my shopping, I plan out 5-6 full meals, make my shopping list, look at my Google Calendar and input when I will eat which meals there, and then write them out on my weekly paper magnetic pad so I see it every day on the refrigerator.

With a family you'd need to cook more than 3 times a week, but I'm just me so I eat leftovers about every other day. I usually plan a fish dish, chicken dish, ground turkey/beef dish, and a vegetarian dish. Depending on which meat I bought more of that week, I either do two chicken dishes or two fish dishes. I buy chicken breasts and tilapia in bags from Sam's so I always have more of those. (And they are healthy!)

And without further adieu... this weeks plan! 

Sunday: 
-Leftover Italian Sausage and Spinach Baked Pasta with Olive Garden Copycat Salad and Dressing (From an Italian themed dinner party. One of my friends made the pasta and it was amazing! I don't even like sausage and I loved it. I'm going to try to get the recipe from her to share with you.)

Monday: 

Tuesday: 

Wednesday:
-Leftovers

Thursday:
-BLT Lettuce Wraps with Baked Zucchini Fries with Sweet Onion Dip (I'll be "skinnying the onion dip)

Friday:
-Leftovers

Saturday:
-Fruit Salsa topped Tilapia with Coconut Milk Wild Rice

Last tips! Always include a veggie and stay away from double starches (like potatoes, rice, and pasta). Try to include things of different colors, make your meal pretty like the rainbow.

I will also be making a skinny homemade Red Velvet Cake for one of my RA's birthdays this week.

What are you making this week?

Sunday, March 18, 2012

Sunday Brunch

As promised, I'm back! Thanks for not giving up on me. Pneumonia is a beast! All I ate for two week was Chicken and Stars, Easy Mac, and chocolate pudding cups. This weekend was one of the first times I've felt like cooking since the sickness attack. Now, I know I'm really better.

Last night I made an extra green and lean shepherd's pie for St. Patrick's Day! I'm getting better at food pictures I think. Yes, I know I go a little collage crazy, but hey, I'm a kindergartner at heart. And you guys love me anyway right? (If you want the recipe, just ask! I could easily post it.)


This morning I got up and made these amazing, tasty, EASY banana pancake muffins! I have a new favorite healthy food blogger: Emily Bites. She is amazing. She does creative and different Weight Watcher friendly recipes. I got these banana pancake muffins from her! I only made very few changes from her recipe. Also, after reading her post to make these cutie muffins, I've totally had the Jack Johnson Banana Pancakes song stuck in my head ALL day. 

Banana Pancake Muffins


I added more banana that she did and I used sugar free syrup. With the sugar free syrup swap (verses the light that she used) I got it to be lower points according to the Weight Watchers Recipe Builder! Her version was 4 points per serving (4 mini muffins) and mine was 3 points per serving. 

Ingredients: 
1 cup Bisquick Heart Smart Pancake and Baking Mix
2/3 cup skim milk
2/3 cup sugar free breakfast syrup
1 1/2 large ripe bananas, chopped into small pieces

Directions: 
Preheat oven to 350. Spray a mini muffin tin with butter flavored baking spray. Stir Bisquick mix, syrup, and milk together until smooth. Chop the banana into small pieces. Spoon 1 tablespoon of mixture into each muffin tin. Divide mixture evenly into the 24 cups. Add banana pieces onto each cup. Depending on the size, I put about 4-6 pieces in each cup. Bake for 12-15 minutes or until golden brown and cooked through. 


It makes 24 muffins, 6 servings of 4 muffins each. Each muffin is 1 points or 3 points per serving. They are the perfect sweetness for me, but if you want extra sweetness you could dust with powdered sugar or serve with extra syrup for drizzling or dipping. I had mine with some fresh strawberries and yogurt! A perfect little Sunday brunch. 


Did I mention that I'm loving this whole church on Sunday nights thing? Sunday brunch just feels luxurious and relaxing. Relaxing should take place on the Sabbath day right? I'm going with it. Now I have these sweet cutie muffins as a breakfast option for all week as well! Oh how I love prep work. And preparing healthy breakfast or lunch options to have for the week. I decided to go ahead and make my faithful crustless quiches as well while I was having a happy Sunday baking day. I used my same base recipe (linked above), but changed them up a bit. I made them big guys instead of little guys. I used fiesta 2% cheese instead of Parmesan and American, added an extra sauteed onion to make them super sweet and oniony, and added some chopped tomatoes. According to the Weight Watchers Recipe Builder they are only 2 points each! For a big filling egg muffin that's not bad! Using a big muffin tin makes 12. 


I'll give you one more to grow on! Just because I've been good about taking pictures, tried some pretty yummy things, and it fits with the brunch theme (even though I kinda sorta ate it as a dessert, oops). 

CHOCOLATE Oatmeal


Holy cow this is good. Like I said, I actually ate it for dessert! But it's totally a breakfast food! I got the recipe from Chocolate Covered Katie, another healthy food blogger I love. I pretty much used her recipe exactly except she does vegan and I don't. I'll post my version, but for the original just see the link above.

Ingredients:
1/2 cup rolled oats (I used the whole grain quick cooking kind)
3/4 cup skim milk
1 banana, smashed
1 1/2 tablespoons of cocoa powder
1 tablespoon Splenda
1/4 teaspoon vanilla
1/8 teaspoon salt

Directions:
Combine all ingredients and cook uncovered over medium-high heat for 5-7 minutes. Stir occasionally. I sprinkled some chocolate chips (a very small handful, less than 1/4 cup) over top and stirred them in just slightly. It's a lot! Two people could eat this as a dessert or one for a hearty, filling breakfast. It's 10 points for the entire serving, 5 for half. I also topped it with a little fat free Cool Whip for 0 points.

Try these out for your next breakfast or brunch. We should have a big brunch pot luck party. That would be fun.

And then...

And then I acquired walking pneumonia, which turned into real pneumonia. And then I thought I was better and thanks to my nifty $100 antibiotic, I got thrush and couldn't swallow. BUT NOW... thrush is getting better and I have recipes from yesterday and today to post. WITH PICTURES. I did fully intend to do the aforementioned posting, but yeah... Life happens. Stay tuned! And never, never get pneumonia.